Are you working on a new website build with the GeneratePress theme and the GenerateBlocks builder, and wondering how you can create a dynamic page header?
Well, you’re in luck!
In today’s post, I’ll show you exactly how to create this dynamic page header, so every page header on your site will look exactly the same, without you having to do the manual work on every page.
Note: This tutorial requires GeneratePress Premium, however you can use GenerateBlocks free version.
What does ‘dynamic’ mean?
What this means is that you do not have to manually insert the content, it is automatically populated on it’s own based on the name of the page you’re working on.
For example, if you’re creating an About page, and you put “About Us” in the title of the page in your WordPress backend, this dynamic page header will automatically pull in the “About Us” text into the page header design — without you doing any extra work.
This is useful to save you time, and be consistent with your layouts.
1. Create a Block Element
First, we’re going to create a block element — this is where we’re going to create the actual page header design.
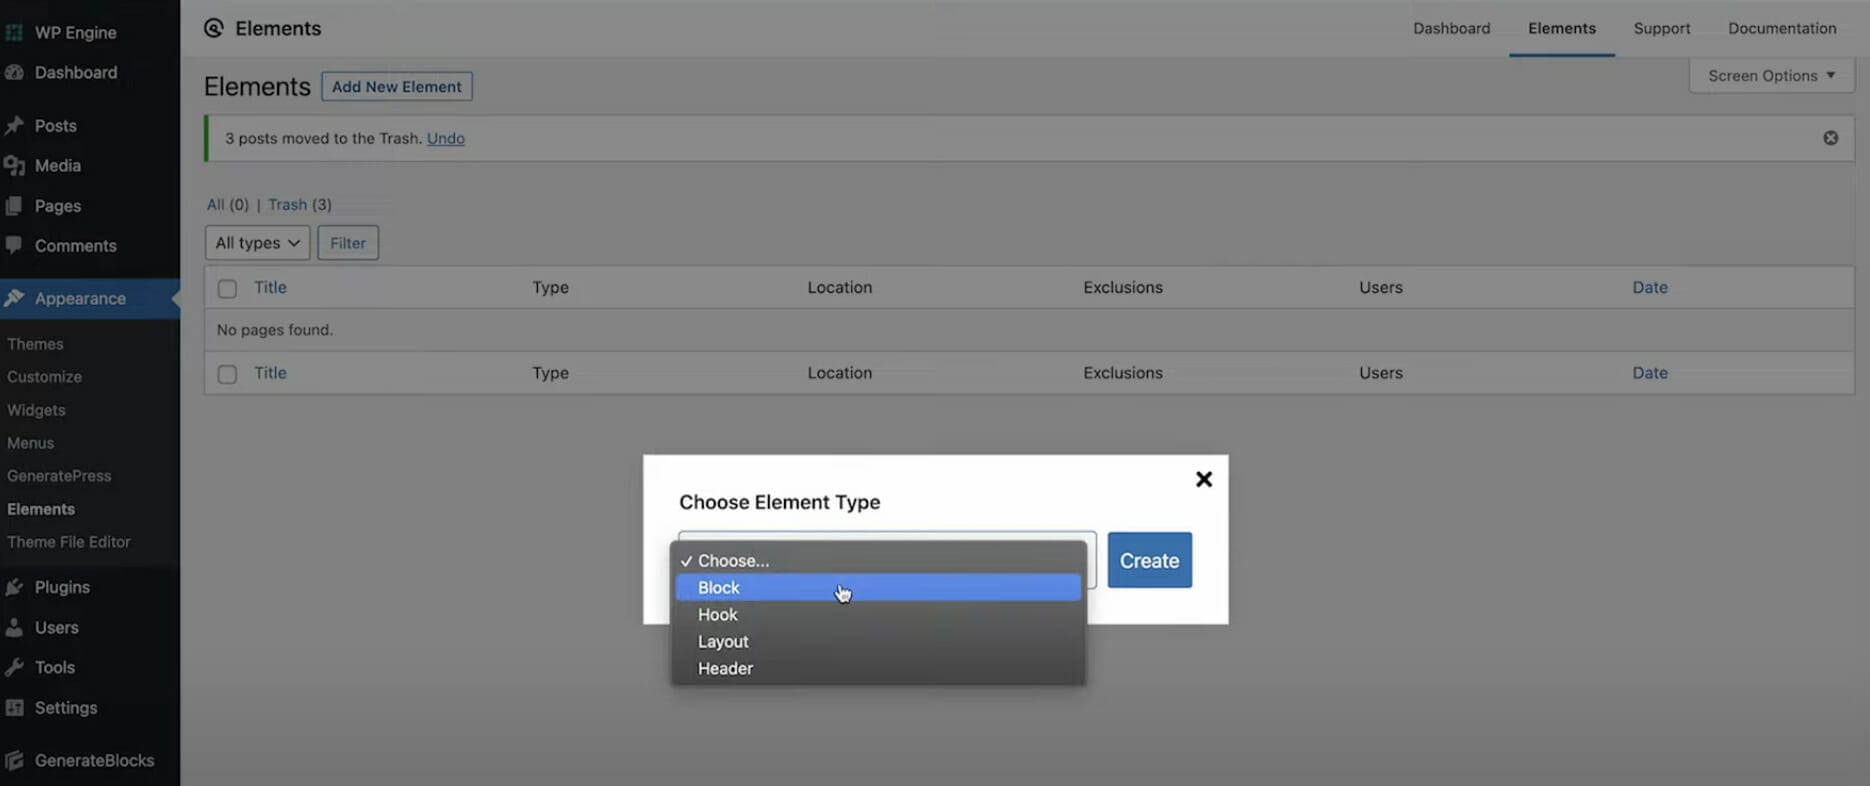
Navigate to Appearance > Elements. Click on Add Element and select “Block” from the dropdown — then hit Create.
2. Add Container & Headline Blocks
Once you’re in the Block Element editor, you can begin creating the page header design.
Start by adding a Container (this is a GenerateBlocks block), then hit the “+” within the Container to add a Headline (also a GenerateBlocks block). Important: Make sure you use the Headline block, and NOT the Heading — Heading is the basic Gutenberg block, but you need to use the Headline block for this tutorial.
Once the Headline block is in, you do not need to type anything there. Hover and/or click on the Headline block to show the options above it. We’ll want to click on the Dynamic icon, which looks like a 3-layer cake, and select Title in the Dynamic text type dropdown.
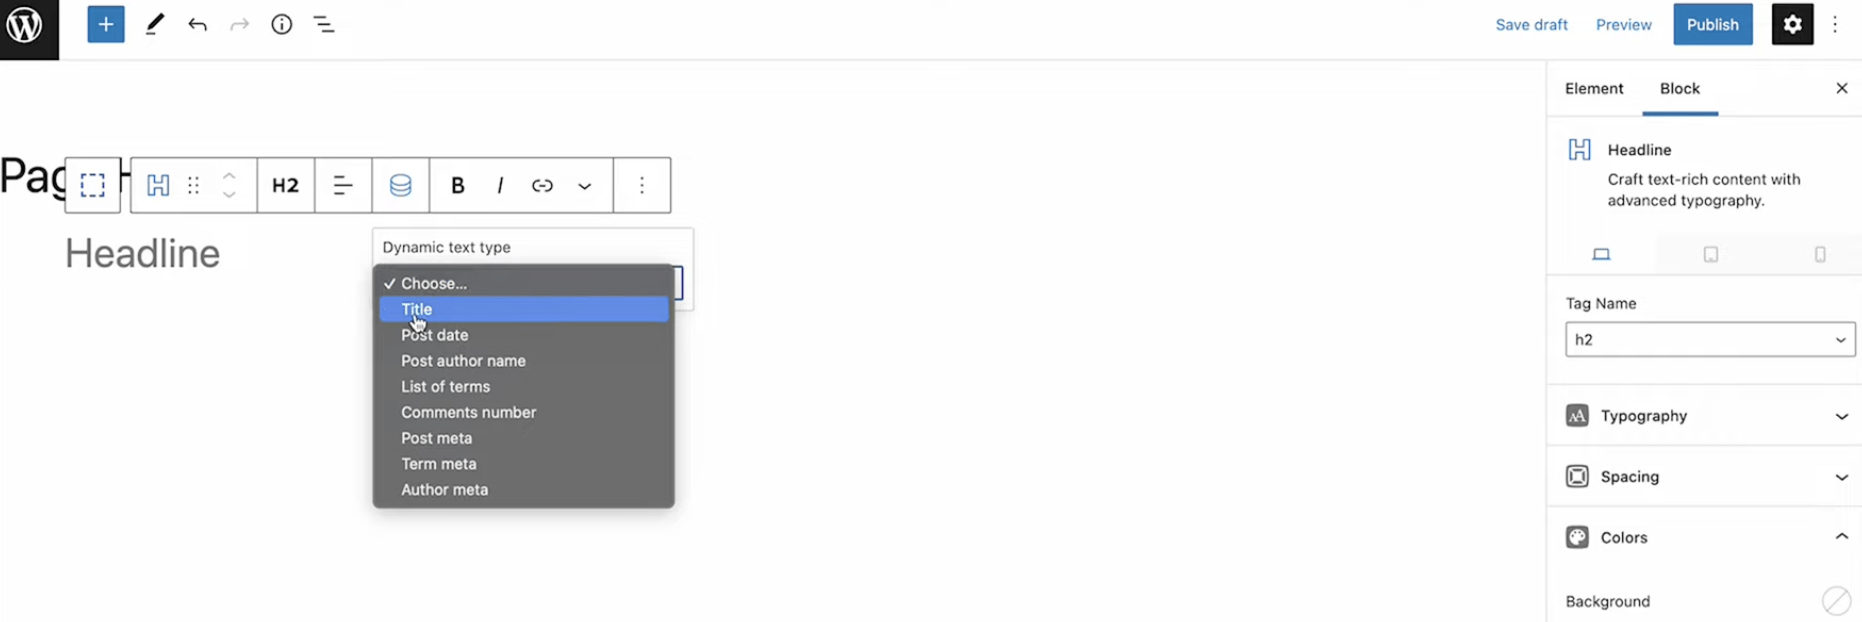
This is exactly where the dynamic power comes into play — it’ll automatically pull in the page title for you.
3. Design the Page Header
Start playing with the design settings within the Container block — in this case we added a light gray background (#F0F0F0), created a offset triangle Shape Divider on the bottom as white (#FFFFFF), and added some padding (100px 20px 100px 20px).
It should look something similar to this (but certainly doesn’t have to — feel free to be creative):

4. Set the Display Rules & Element Type
This is one of the most important parts of this tutorial. In order for your dynamic page header to even be visible on your website, you must set the Display Rules, found at the bottom of your editor page.
For Location, you can set it to “Entire Site”.
Now we want to then think about our website — do we want the Page header to be on our Homepage? Probably not, as this is usually. So, under Exclude, select “Front Page”. This will exclude from showing the Page Header on the homepage.
For Users, you can select “All Users”.

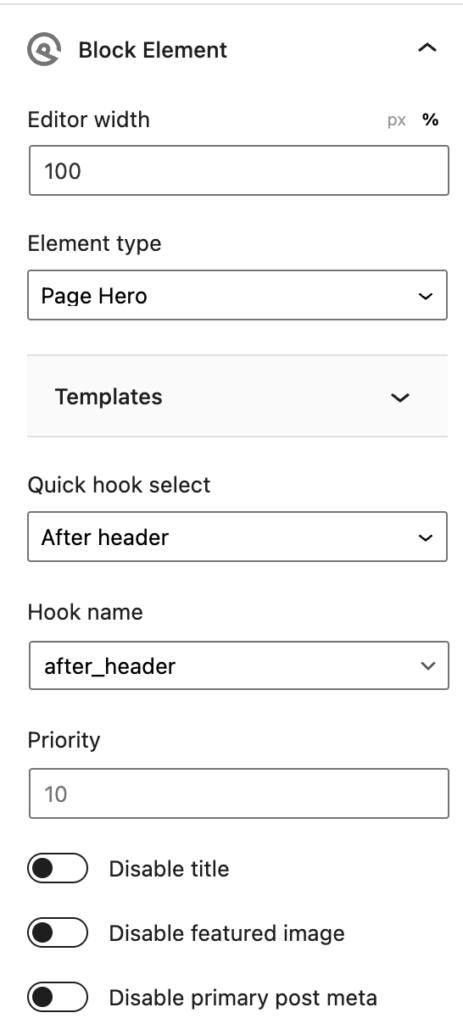
Now, in your sidebar settings, under Block Element > Element Type, you want to select “Page Hero” — this will set this header to show as the very first thing on the page.
This will open a new set of options under Templates, in which you can leave all of those alone as-is.
Once selected, go ahead and hit Publish in the top-right of your screen to make your page header live!
Click over to the frontend of your website, view a page (other than the homepage) and you’ll see your Page Header is now visible and showing that page’s title:

That’s it!
There you have it — that’s how simple it is to create a dynamic page header with GeneratePress Premium & GenerateBlocks.
In the YouTube video above, you will see additional steps to make your page header merge with the navigation, however this is not necessary and only for personal preferences based on your website design and layout.
I hope you found this useful, and be sure to follow my YouTube channel for more tutorials!
